This is an odd concertina book, it has a concertina of pages through which a concertina arm stretches through from the back. It has ended up being a documentation of what has touched me in the last few days and what I have touched. Seed potatoes are chitting, the bulbs and spring flowers are a balm for the eyes. Bird song has been a mind fixing melody of my early solitary morning walks and I have been removing litter.
Showing posts with label Project for Kids. Show all posts
Tuesday, 24 March 2020
Concertina hole book IV
This is an odd concertina book, it has a concertina of pages through which a concertina arm stretches through from the back. It has ended up being a documentation of what has touched me in the last few days and what I have touched. Seed potatoes are chitting, the bulbs and spring flowers are a balm for the eyes. Bird song has been a mind fixing melody of my early solitary morning walks and I have been removing litter.
Wednesday, 31 October 2018
Halloween
Armed with baskets of painted pumpkins and sticks, last weekend we were at the Halloween street festival in Perth, letting kids be creative and make pumpkins and wands.
These events are often tricky to design an activity for as it has to be quick and relatively mess free, the creation ready to go instantly, with no drying time available.
Most creations went without photographic evidence as we were so busy and sticky with glue etc but here are some, I did insist to parents that the monsters were edible as well and once halloween was over they should be peeled and cooked.
Happy Halloween
Monday, 2 October 2017
Super Vegetables
Some of the creative super vegetables created this weekend in Paisley, a great workshop to encourage creativity but also an interest in vegetables, cooking, and healthy eating.
Sunday, 14 May 2017
ずぼんぼ Shizenbo
I have been playing with these Japanese toys since seeing them on social media. They are a traditionally a paper toy that looks like a tiger or a lion dancing. They can be very simple or complex in design but are fun to bring to life. I wanted to make mini beasts but also had a go at making a rabbit.
You make an upside down box that can catch the air attach legs with weighted feet and then you fan it so that it rises or moves. I tried a rabbit and a fly and spider and have made ladybird instructions for you.
Sunday, 16 April 2017
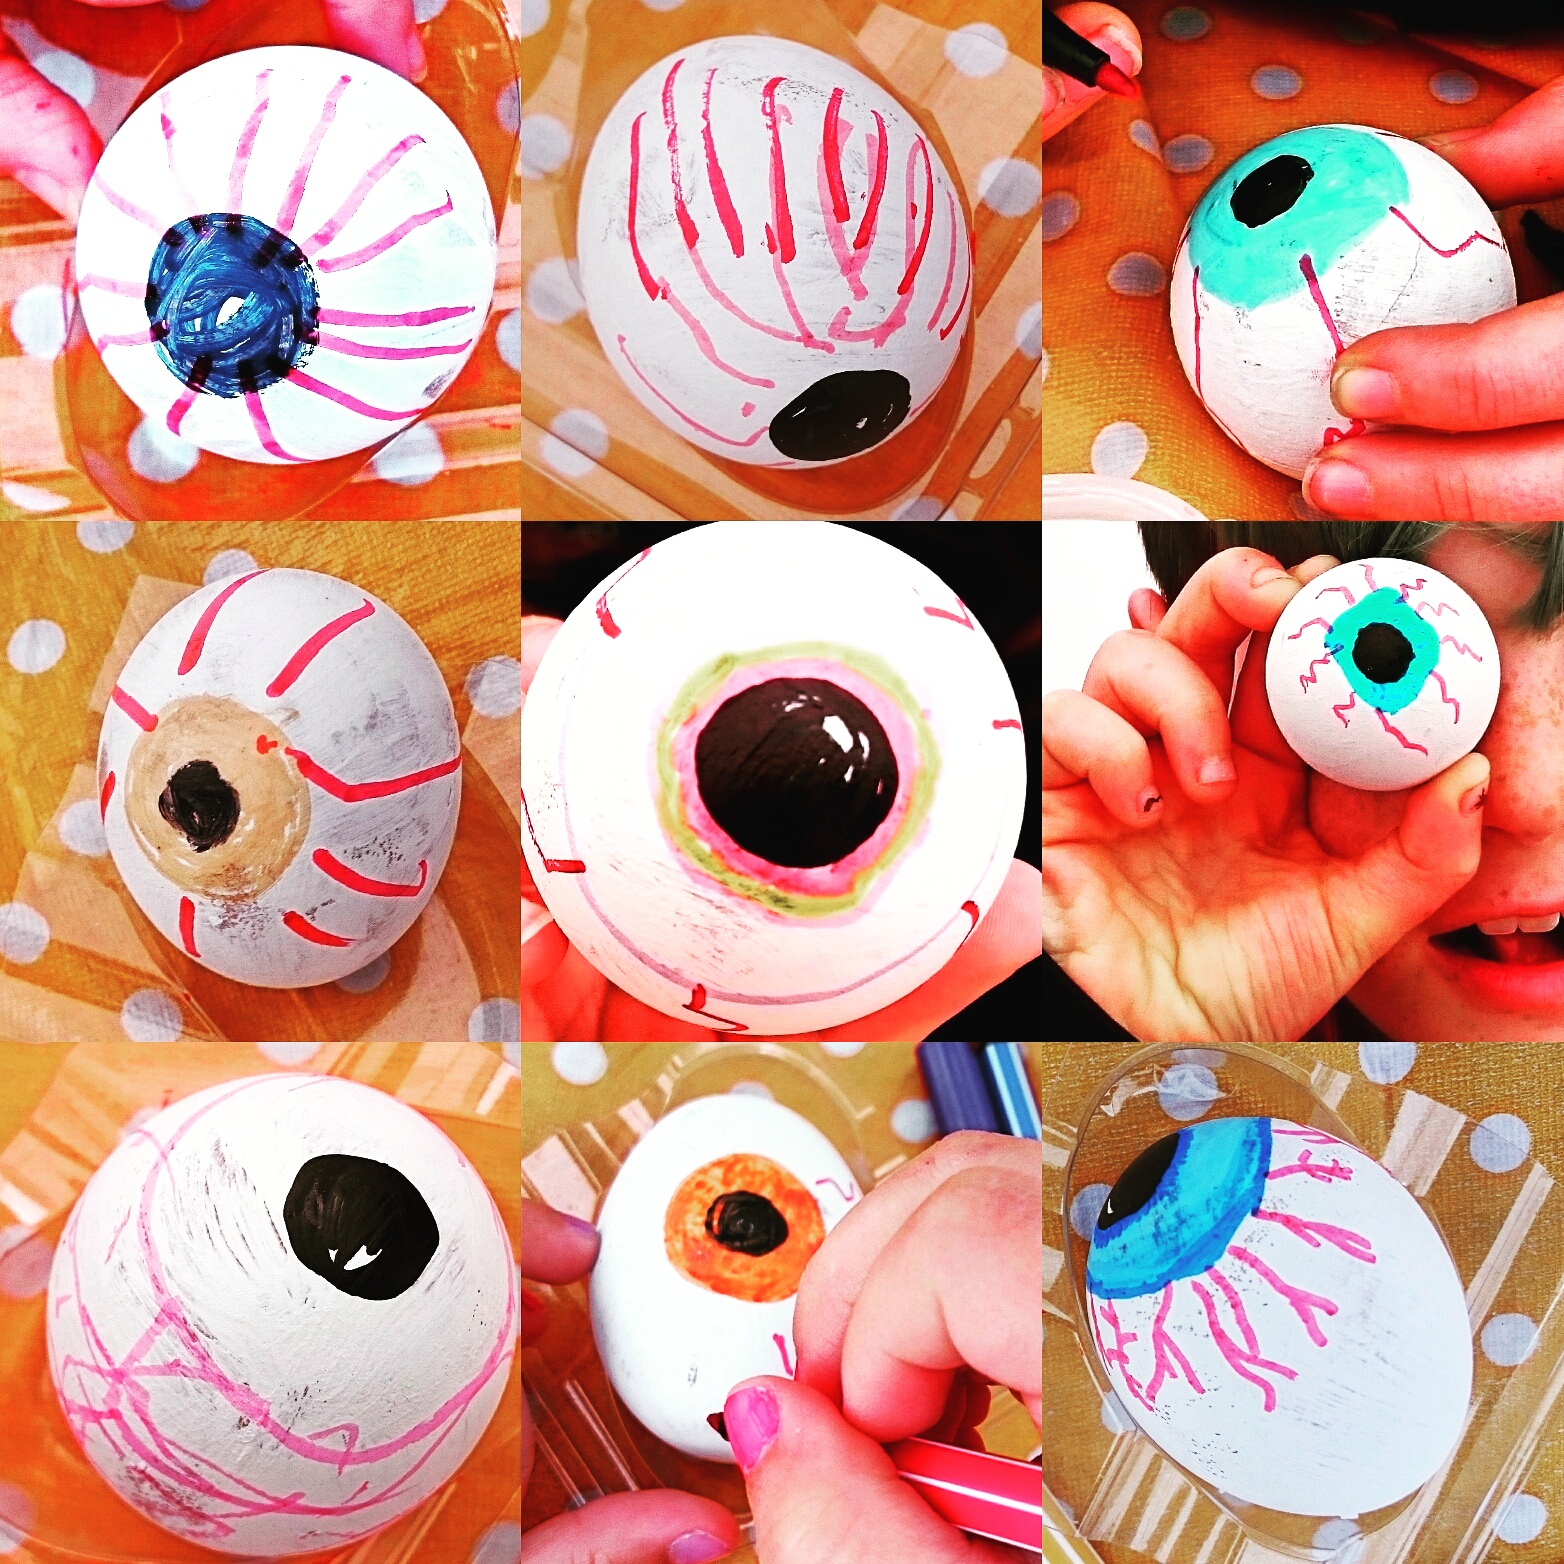
Eggs and eyeballs
Easter Sunday and I have been at a pirate event, holding a replacement eye workshop.
Today was a ninety egg (eye) day and I was so happy as we completed the last eye in the final 5 minutes, perfect!
Egg Days
Ninety eggs have been scrubbed and boiled, ready to be dyed and painted to Easter perfection and many Bunny mask templates have been cut to shape.
Hope you are having a lovely spring weekend.
Monday, 31 October 2016
Mini Bat and Ghost Kites for a windy Halloween
Very simple little Kites for a windy Halloween, I have to admit the bat did not fly very well, but he looks good, the ghosts are good at flying.
Skeleton workshops
Last Friday I took some workshops for kids, as it was just pre-halloween and we made skeletons. I love working with children and witnessing their beautiful vision of the world.
Sunday, 3 July 2016
Trouser Book
A trouser book is a very simple book that can be made from a piece of A4 paper or larger.
Try to be accurate and crisp with your folds.
Fold your paper in half, open out and fold in half the other way.
Try to be accurate and crisp with your folds.
Open it out landscape in front of you and fold both sides into the center line.
Your paper has been folded into eight sections. Turn it portrait way and cut up to the gusset of the trouser (where the scissors are lying) in picture below (left) you will end up with a paper trouser shape like blow (righ).
You then fold this up into a concertina, you have to reverse some of the folds to achieve this. The result is a small concertina book with a central secret section.
Books and baddies
The lady above has a collaged grey bob and her name is 'Mrs Queen', famous for being mean and hitting children with leather gloves.
Below are some further examples of the children's work, they loved this projects writing endless stories and then storytelling.
Friday, 24 June 2016
Shaving Foam Marbling
I started shaving foam marbling/ printing last year with my students. It is a sensory overload as you are assaulted with the potent pong of aftershave, your hands get covered in foam and paint and the colour is vivid and wonderful.
It is fun, you get great results but it can get very messy.
Ingredients:
A tray with a lip of 1-2cm
Shaving foam
ready mixed paints of various colours
a stick (for swirling)
lots of paper
a pallet knife
Cover your tray in shaving foam.
Smooth with pallet knife
Drip or splatter paint over the surface.
draw swirly pattern through this and print onto paper by gently pressing the paper onto surface of the foam.
Then use your pallet knife to scrape excess foam/ paint from the paper and leave to dry.
Excess foam can be returned to the tray, smooth it off and repeat the process until the foam is too brown or flat to continue.
The resulting papers can be used for collage, decoupage, book binding, or as I use them as a method of tapping into the imagination by getting the creator to look into the pattern and pull out things that they can see there.
Saturday, 29 August 2015
Bubbles and dirty baths
I am working on two different (maybe 3) projects right now.
One is an incredibly detailed realistic study of crab claws the other two are secret. I find I need to balance producing detailed work by doing more exuberant, experimental work and processes, and so I found myself bubble printing yesterday.
My bubbles are all black as I wanted the scummy effect of a not so clean bath. But of course you can print your bubbles in any colour and I am sure I will be making some coloured ones soon. Strangely for such a simple technique, I had to experiment in order to get the effect I wanted, and get quite technical.
Instructions
Ingredients
A shallow tray (I used a roasting dish)
Washing up liquid
Paint (I used acrylic)
a hand whisk
a drinking straw
Paper cut to the size you require.
Technique
You make a shallow tray of coloured water diluting your paint.
Add a squirt of washing up liquid.
Stir it all up
Use your straw to exhale into the water and produce a carpet of bubbles over the surface.
If the print is not clear enough add more paint. If the bubbles not bubbly enough add more washing up liquid.
What I found is that blowing with the straw makes a nice even carpet of bubbles all the same size. But I did not want my bubbles all the same size, I found that if you whisk up your water you will make lots of small bubbles and then I used the straw to add larger ones. This produced a good variety and a range of marks. I also over printed many of them to fill in gaps or give them more impact if they were too light.
Subscribe to:
Posts (Atom)